Introduction to Rubber Band Bracelets
How to make bracelets with rubber bands? Rubber band bracelets have swept over the crafting world. Simple to make and fun to wear, these bracelets are perfect for crafters of all ages. Engaging in making these bracelets often leads to hours of DIY enjoyment.
Don’t be afraid to try out different patterns and color combinations to create unique and eye-catching bracelets. Once you have made a few bracelets, share them with friends and family or even start selling them. Have fun and get creative with your rubber band bracelets!
What are Loom Bands?
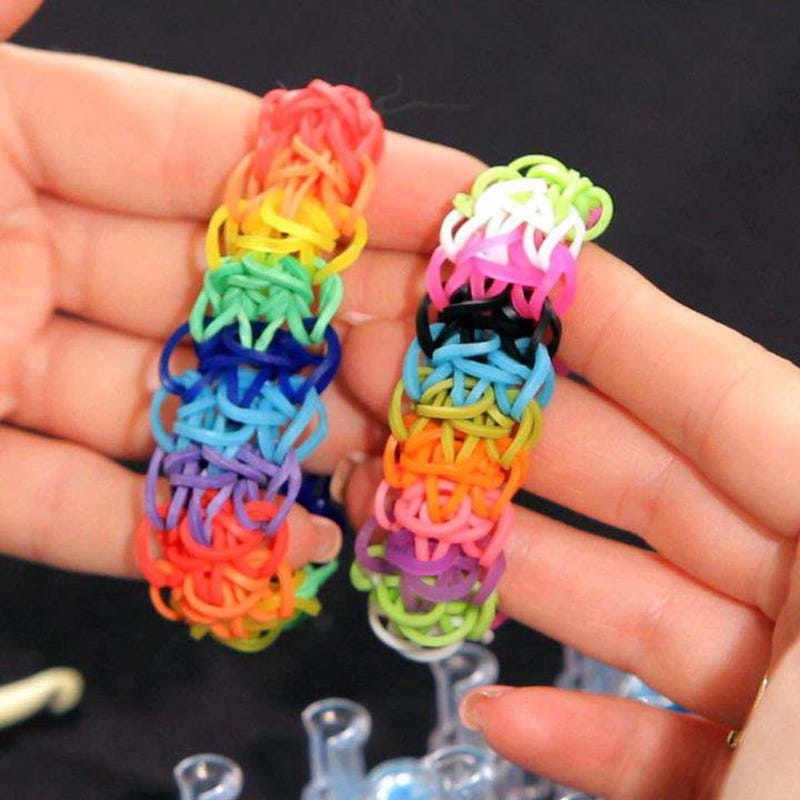
Loom bands are tiny, elastic bands designed for craft projects. They come in a wide variety of colors. Crafters use these bands to weave and create different patterns for bracelets, keychains, and charms. They are stretchable, making them ideal for fitting various wrist sizes.
The Popularity of DIY Bracelets
DIY bracelets have become a popular activity. They offer personalization and an opportunity for self-expression. Children and adults alike appreciate the satisfaction that comes from creating something unique by hand. Sharing these creations with friends strengthens bonds and spreads joy. With endless possibilities for designs, making bracelets with rubber bands continues to be a beloved pastime.
Essential Supplies for Making Rubber Band Bracelets
Before you begin creating your own rubber band bracelets, gathering the right supplies is key. Quality materials will result in more durable and attractive bracelets.
Selecting Quality Loom Bands
When choosing loom bands for your bracelets, opt for ones that won’t easily snap. Look for bands that feel stretchy yet strong. Higher-quality bands often come in vibrant colors that don’t fade quickly. Always read reviews if you’re buying online to ensure you’re getting a reliable product.
Necessary Tools and Accessories
While you can make a bracelet with just your fingers, a few tools can help. You’ll need a C-clip to secure the ends of the bracelet. If you struggle with using your fingers, a small hook or bracelet tool can assist you. Remember, a crochet hook can work, but make sure it’s not too large for the small bands. Keep your supplies organized for a hassle-free and fun crafting experience!
Step-by-Step Guide to Crafting a Rubber Band Bracelet
Creating your own rubber band bracelet is a fun, easy activity that requires minimal supplies.
Starting with a C-Clip
Begin your bracelet by threading a rubber band through a C-clip. Flatten the band between your fingers into an ‘S’ or figure-8 shape before doing so. This will be the anchor point for your bracelet.
Creating the Single Chain Design
Next, loop another rubber band through the first one. Again, flatten it before attaching to ensure a secure fit. Keep adding bands in this manner, making sure each is flat and snugly connected. Use a simple over-under technique to weave them together into a single chain design. This pattern is easy, making it ideal for beginners and kids.
Finishing the Bracelet with a C-Clip
Once your bracelet reaches the desired length, it’s time to secure the ends. Take the final band and connect it to the other side of the C-clip. This forms a circle and completes your bracelet. Now, your wrist can show off your new, colorful creation.
Whether you craft alone, with friends, or make matching bracelets for teddy bears, enjoy the process and wear your DIY project with pride.
Creative Ideas for Rubber Band Bracelet Variations
When crafting, variety keeps things exciting. Rubber band bracelets offer many patterns and designs for endless creativity.
Different Patterns and Designs
With just rubber bands and a C-clip, you can explore a multitude of patterns. Simple chains are just the start. Try the fishtail, zigzag, or diamond patterns to amp up your bracelet game. Each design brings a different twist and style. The fishtail creates a thicker, more intricate look. Zigzags add bold, geometric flair. Diamonds sparkle with complexity and charm. Test and combine patterns to craft your unique creations. Step-by-step guides can help you master these designs.
Making Bracelets for Friends and Teddy Bears
Rubber band bracelets are perfect for sharing. Make matching sets for you and your friends to celebrate your bond. Young crafters enjoy creating bracelets for their teddy bears too. These tiny accessories add a personal touch to playtime. Making friendship bracelets strengthens connections and sparks joy. Use vibrant colors to represent different personalities or shared memories. These bracelets, simple in nature but rich in affection, make memorable gifts.

Troubleshooting Common Issues
When crafting rubber band bracelets, you may encounter some hitches. Here are ways to resolve common problems.
Tips for Beginners
- Start Simple: Choose projects that suit your skill level. The single chain design is ideal for starters.
- Stay Organized: Keep your bands and tools in order, making it easier to find what you need.
- Use Quality Bands: Pick bands that won’t snap easily to save frustration.
- Take Breaks: If you’re struggling, pause and return later with fresh eyes.
- Watch Tutorials: Visual guides can be incredibly helpful. Look up videos on how to make bracelets with rubber bands.
Solutions for Common Problems
- Snapped Bands: If a band snaps, simply replace it and continue your bracelet.
- Loose Clips: Make sure your C-clip is securely fastened to avoid your bracelet coming apart.
- Incorrect Patterns: Double-check the pattern instructions if your bracelet doesn’t look right.
- Tangled Bands: If bands tangle, gently untangle them or use new ones to keep working.
- Stiffness in Fingers: If your fingers get sore, give them a rest. Stretch and massage them before continuing.
By mastering these troubleshooting tips, you’ll enhance your crafting skills and enjoy a smoother bracelet-making experience.
Cost and Quality Considerations
When making rubber band bracelets, it’s crucial to balance cost with quality.
Where to Buy Loom Bands and Accessories
Loom bands and accessories are available at craft stores and online. Amazon offers a wide range, including kits with charms. Make sure to opt for stores with a good reputation for quality.
Assessing the Quality of Loom Bands
It’s important to choose loom bands that are stretchy yet durable. Avoid thin bands that break easily. Read reviews, and be wary of low-cost packs that may be of poor quality.

FAQs about Rubber Band Bracelets
Rubber band bracelet crafting raises many questions, especially for those new to the hobby.
How Many Bands to Make a Bracelet?
The number of loom bands needed varies by wrist size and design. A basic bracelet typically needs about 25 rubber bands. However, if your wrist is larger or the pattern is more intricate, you may need more bands. It’s a good idea to have extra bands on hand just in case.
Alternatives to the Rainbow Loom
Don’t have a loom? No problem. Your fingers are your best tool for simple designs like the single chain. For more complex patterns, a small crochet hook or a DIY loom made from household items, like pencils and clips, can work.
Where to Find Inspiration for New Designs
Looking for fresh ideas? Online searches bring up tons of tutorials. Popular crafting websites and social media platforms are chock-full of creative options. Remember to type in ‘loom band bracelet designs’ for a wide variety of patterns to try. You can add charms, beads, or other decorations to your bracelet to personalize it further.
Tags: attractive bracelets, color and creativity, colorful creation, how to make bracelets with rubber bands