
Introduction
Clay bead bracelets are not only fashionable and versatile accessories but also provide an opportunity for creative self-expression. Making your own clay bead bracelets allows you to unleash your imagination and personalize your jewelry collection with unique designs and vibrant colors. In this article, we will take you through the step-by-step process of creating clay bead bracelets. From selecting the materials and creating the beads to assembling and finishing the bracelet, this guide will inspire you to embark on a delightful crafting journey.
Crafting clay bead bracelets offers an opportunity to express your unique style and creativity while creating stunning and personalized accessories. From selecting the right materials and tools, shaping and baking the beads, to assembling and adding additional embellishments, each step in the process contributes to the beauty and individuality of the final bracelet. By following the steps outlined in this guide and applying your own personal touches, you can create clay bead bracelets that reflect your style and become cherished pieces in your jewelry collection. Enjoy the journey of crafting and wearing these delightful accessories that will add a touch of handmade charm to your daily ensembles.
Part 1: Gathering Materials and Tools
Level 1: Clay Selection
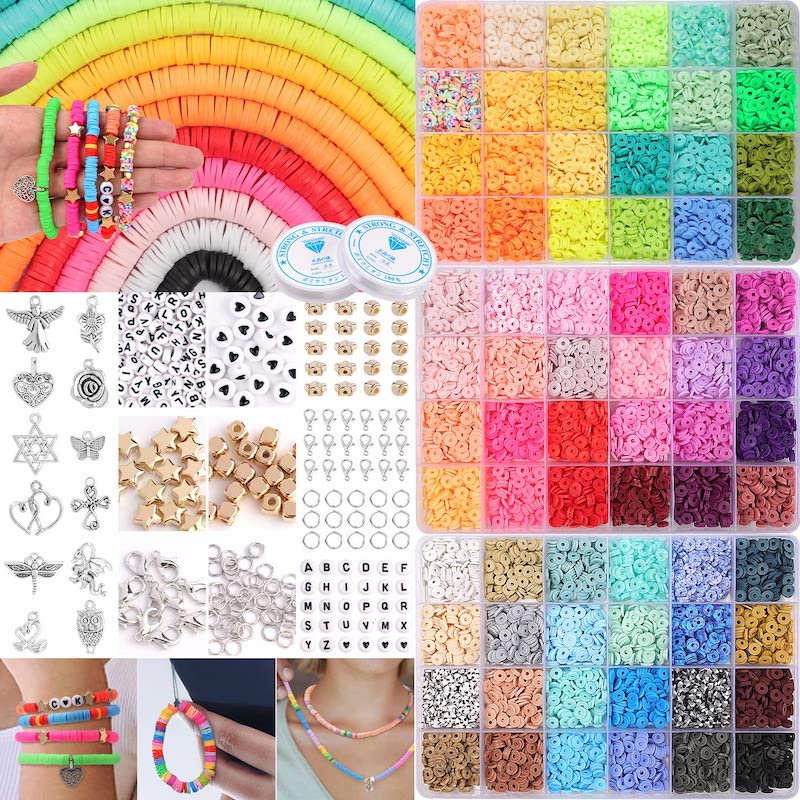
Choosing the right type of clay is crucial for successful bead-making. Considerations include air-dry clay or polymer clay, each with its own properties and methods of hardening. Research various brands and colors to find the perfect clay that matches your vision for the bracelet.
Level 2: Bead-Making Tools
To shape and mold the clay into beads, you will need a few essential tools such as clay sculpting tools, toothpicks, rolling pins, cutters, and a work surface. These tools will help you achieve different bead shapes and textures and make your crafting process smoother.
Part 2: Preparing the Clay and Creating Beads
Level 1: Conditioning the Clay
Before starting, soften the clay to make it more pliable and easier to work with. Conditioning the clay involves kneading it with your hands or using a dedicated clay conditioning machine. This step ensures that the clay is malleable and free from air bubbles.
Level 2: Shaping the Beads
Once the clay is conditioned, you can begin shaping the beads. Roll the clay into small balls or use cutters to create specific shapes. Experiment with different sizes and textures to add depth and visual interest to your bracelet. You can also incorporate patterns, stamps, or texture tools to create unique designs on the beads.
Part 3: Baking and Hardening the Beads
Level 1: Air-Dry Clay
If using air-dry clay, follow the manufacturer’s instructions for drying and hardening. Generally, air-dry clay needs to be left undisturbed for a specific period until it fully dries and hardens. Some types may require additional steps like sanding or sealing for a smoother finish.
Level 2: Polymer Clay
Polymer clay requires baking to cure and harden. Preheat your oven to the temperature specified by the clay manufacturer. Place the clay beads on a baking sheet lined with parchment paper and bake them for the recommended time. Allow the beads to cool completely before handling them. Be cautious not to overbake, as it can lead to discoloration or brittleness.
Part 4: Assembling the Bracelet
Level 1: Determining the Design
Consider the design and layout of your bracelet. Decide on the order and arrangement of beads, spacers, or other decorative elements like charms or pendants. This will ensure a cohesive and visually pleasing final result.
Level 2: Stringing and Securing
Select an appropriate stringing material such as stretch cord, beading wire, or hemp cord, depending on your preference and bead hole sizes. Begin stringing the beads, incorporating spacers or charms as desired. Once you reach the desired length, secure the ends of the stringing material using appropriate closures like clasps or knots, ensuring a snug fit.
Part 5: Finishing Touches and Personalization
Level 1: Adding Finishing Accents
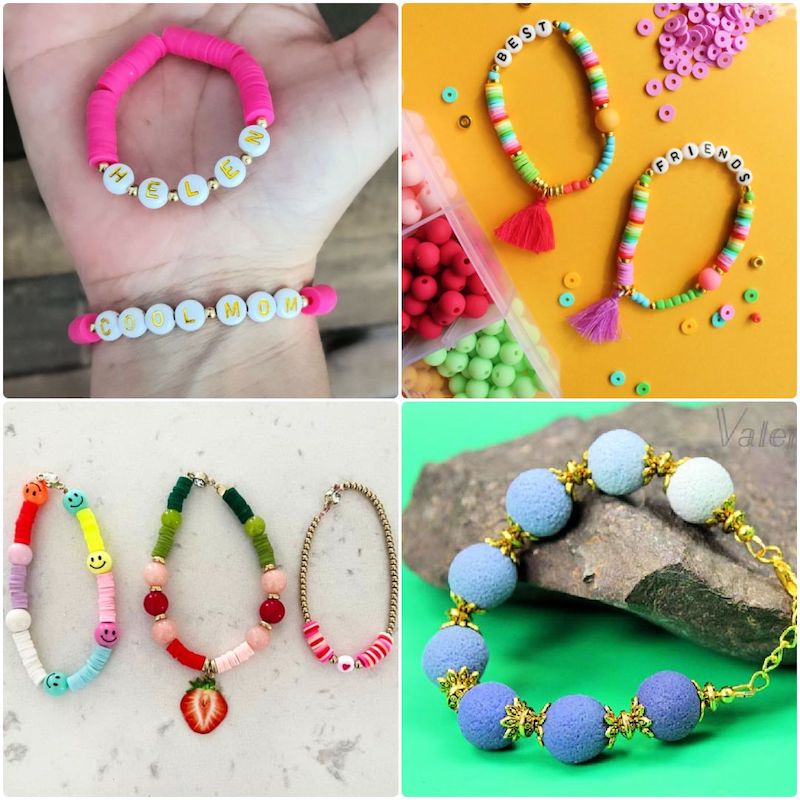
Consider adding additional elements to enhance the overall aesthetic of your bracelet. These could include adding a focal bead, incorporating metal or glass beads, or attaching dangles or charms. Get creative and experiment with different combinations to add your personal touch.
Level 2: Decorating and Sealing
If desired, you can decorate the surface of the hardened clay beads further by applying paints, markers, or varnishes. Make sure to use compatible materials and allow sufficient drying time before wearing the bracelet. Applying a sealant or varnish not only protects the beads but also gives them a glossy finish.
Part 6: Adding Extra Embellishments and Charms
Level 1: Bead Embellishments
Take your clay bead bracelet to the next level by adding extra embellishments. Consider using adhesive rhinestones, small gems, or beads to decorate the surface of your clay beads. You can create patterns or randomly scatter them for a touch of sparkle and visual interest.
Level 2: Attach Charms
Charms are a wonderful addition to clay bead bracelets, adding a personal touch and telling a story. Select charms that hold significance to you or reflect your interests and passions. Use jump rings or small loops to attach the charms to your bracelet, strategically placing them among the clay beads.
Part 7: Layering and Stacking Clay Bead Bracelets
Level 1: Mixing Colors and Sizes
Creating a layered or stacked look with clay bead bracelets can elevate your style and create a more dynamic and eye-catching accessory. Experiment with different color combinations and sizes of beads to achieve a visually appealing and cohesive look. Play with contrast or opt for a monochromatic theme for an understated elegance.
Level 2: Balancing Textures and Materials
Incorporate other types of bracelets or materials into your stack to create a more diverse and eclectic look. Mix clay bead bracelets with metal bangles, leather bracelets, or beaded strands. Pay attention to textures and materials that complement each other, ensuring a harmonious composition.
Part 8: Caring for and Maintaining Clay Bead Bracelets
Level 1: Avoiding Excessive Moisture and Heat
While clay beads are generally durable, it’s recommended to avoid prolonged exposure to excessive moisture or heat. Remove your clay bead bracelets before swimming, showering, or engaging in activities that may expose them to moisture. It’s also advisable to keep them away from direct sunlight or heat sources that could cause the clay to soften or fade.
Level 2: Storage and Cleaning Tips
Store your clay bead bracelets in a dry and cool place, away from direct sunlight, humidity, or extreme temperatures. To clean them, gently wipe the beads using a soft, damp cloth to remove any dirt or fingerprints. Avoid using harsh chemicals or abrasive cleaners that could damage the surface of the clay. Regularly inspect your bracelet for any signs of wear or loose beads and make necessary repairs.
Conclusion
Crafting clay bead bracelets allows you to unleash your creativity and create unique and personalized accessories. By selecting the right materials, mastering bead-making techniques, and incorporating your personal touch, you can fashion bracelets that reflect your style and individuality. Whether you gift them to loved ones or keep them for yourself, these clay bead bracelets will serve as delightful reminders of your crafting journey. So gather your materials, let your imagination soar, and embark on a gratifying endeavor as you create stunning clay bead bracelets that will bring joy and adornment to your wrists.
In conclusion, crafting clay bead bracelets is a rewarding and fulfilling process that allows you to showcase your creativity and personal style. By following the steps outlined in this guide, you can create unique and beautiful bracelets that are a true reflection of your individuality. From selecting the perfect clay and shaping the beads to assembling and adding finishing touches, each step in the journey contributes to the final masterpiece. Whether you wear them on their own, stack them with other bracelets, or gift them to loved ones, clay bead bracelets will be cherished for their handmade charm and the heartfelt effort put into their creation. Embrace the joy of crafting and enjoy the beauty and adornment these bracelets bring to your life.
Tags: accessories, creativity, How to Make Clay Bead Bracelets