Part 1: Introduction to Elastic Bracelets – Why They’re a Perfect DIY Project
Level 1: What Are Elastic Bracelets?
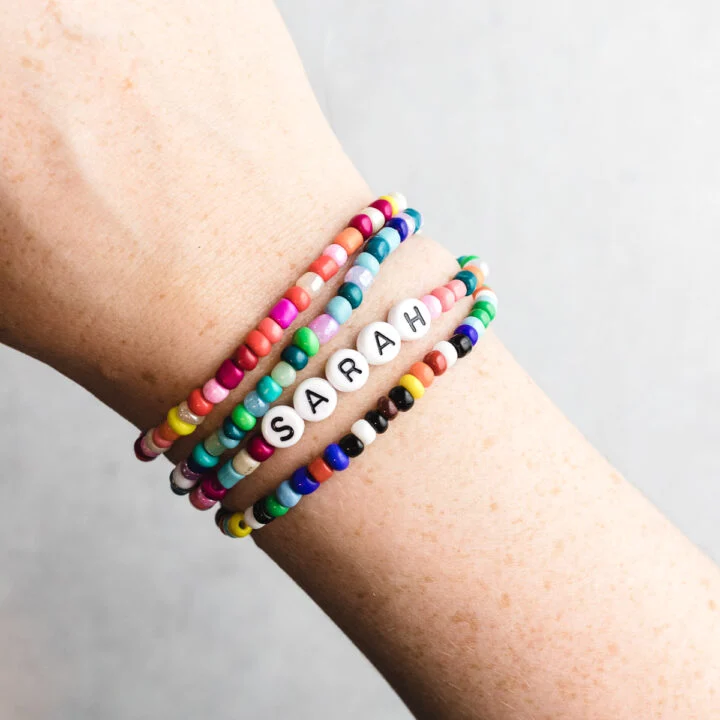
How to make elastic bracelets? Elastic bracelets are stylish, comfortable, and versatile accessories made by stringing beads onto elastic cord. Unlike traditional clasped bracelets, elastic bracelets slip easily over the wrist, making them ideal for everyday wear or gifting.
- Why Choose Elastic Bracelets?
Elastic bracelets are beginner-friendly and require minimal tools, making them an excellent entry point for jewelry-making enthusiasts. Their stretchy design ensures a snug fit without the need for complex closures, appealing to both kids and adults. - Versatility in Design:
From simple single-strand designs to intricate multi-layered creations, elastic bracelets can be customized with various beads, colors, and patterns. This flexibility allows crafters to create pieces that reflect their personal style or suit specific occasions.
Level 2: Benefits of Making Your Own Elastic Bracelets
Creating your own elastic bracelets offers numerous advantages beyond just having a beautiful accessory.
- Cost-Effective Crafting:
Making elastic bracelets at home is often more affordable than purchasing ready-made jewelry. You can buy materials in bulk and experiment with different combinations without breaking the bank. - Personalization and Gifting:
Handmade elastic bracelets make thoughtful gifts for friends, family, or special events like birthdays, weddings, or holidays. Adding personalized touches, such as initials or birthstones, makes these bracelets even more meaningful.

Part 2: Materials and Tools Needed – Building Your Foundation
Level 1: Essential Supplies for Making Elastic Bracelets
To get started, you’ll need a few basic supplies that form the backbone of any elastic bracelet project.
- Beads:
Choose from a wide variety of beads, including glass, wood, metal, acrylic, or gemstone beads. Each type brings its unique texture, weight, and aesthetic appeal to your bracelet. - Elastic Cord:
High-quality elastic cord is crucial for durability and comfort. Look for cords labeled as “jewelry-grade” with thicknesses ranging from 0.5mm to 1mm, depending on the size of your beads’ holes.
Level 2: Additional Tools and Accessories
While not mandatory, certain tools can enhance precision and efficiency when crafting elastic bracelets.
- Scissors or Beading Thread Cutters:
Sharp scissors or specialized thread cutters ensure clean cuts, preventing frayed ends that could weaken the bracelet. - Crimps or Glue (Optional):
Some crafters use small crimp beads or clear adhesive glue to secure knots. These extras provide added peace of mind, especially for bracelets intended for frequent wear.
Part 3: Step-by-Step Instructions – Creating Your First Elastic Bracelet
Level 1: Basic Steps for Beginners
Follow this straightforward process to create your first elastic bracelet:
- Measure and Cut the Cord:
Wrap the elastic cord around your wrist twice to determine the correct length, then add about 2 inches extra for tying knots. Cut the cord using sharp scissors. - String the Beads:
Slide your chosen beads onto the elastic cord in your desired pattern. For beginners, start with a simple alternating color scheme or gradient design.
Level 2: Advanced Techniques for Unique Designs
Once you’ve mastered the basics, try incorporating advanced techniques to elevate your creations.
- Layered Bracelets:
Create multiple bracelets of varying lengths and stack them together for a chic layered look. Mix and match bead sizes, shapes, and textures for visual interest. - Adding Charms or Pendants:
Incorporate charms or pendants into your design by threading them alongside beads. Use jump rings if necessary to attach larger decorative elements securely.

Part 4: Tips for Success – Ensuring Durability and Style
Level 1: Practical Tips for Crafting Durable Bracelets
A well-made elastic bracelet should last through regular wear. Here’s how to ensure longevity:
- Double Knotting:
After stringing all the beads, tie a surgeon’s knot (a double-overhand knot) to secure the ends. Pull tightly but carefully to avoid snapping the cord. - Stretch Testing:
Gently stretch the bracelet after tying to test its resilience. If it feels too tight or loose, adjust the number of beads accordingly before finalizing the knot.
Level 2: Enhancing Aesthetic Appeal
Beyond functionality, focus on creating visually stunning bracelets that stand out.
- Color Coordination:
Use a color wheel to select complementary or contrasting hues for your beads. Monochromatic schemes offer elegance, while bold contrasts create eye-catching statements. - Balancing Proportions:
Pay attention to the size and spacing of beads. Larger focal beads paired with smaller spacer beads create balance and prevent overcrowding.
Part 5: Troubleshooting Common Issues – Solutions for Smooth Crafting
Level 1: Addressing Structural Problems
Even experienced crafters encounter hiccups during the bracelet-making process. Here’s how to troubleshoot common issues:
- Breaking Elastic Cord:
If your cord snaps frequently, consider upgrading to a higher-quality brand or increasing the cord’s thickness. Ensure knots are tied securely and reinforced with glue if needed. - Loose Beads Falling Off:
Check the hole size of your beads relative to the cord diameter. If beads are slipping off, switch to a thicker cord or use spacer beads to stabilize the arrangement.
Level 2: Fixing Design Flaws
Sometimes, the finished product doesn’t turn out quite as envisioned. Don’t worry—these fixes will help salvage your efforts.
- Uneven Patterns:
Rearrange beads directly on the cord until the pattern looks balanced. Alternatively, remove beads one by one and restring them in the correct order. - Excessive Bulkiness:
If the bracelet feels too heavy or bulky, replace some large beads with lighter alternatives or reduce the overall number of beads used.
Inspiration Gallery – Ideas to Spark Your Creativity
Level 1: Simple Yet Elegant Designs
For those who prefer understated elegance, here are some minimalist ideas:
- Single-Strand Pearl Bracelet:
String white freshwater pearls onto clear elastic cord for a timeless piece perfect for formal occasions. - Rainbow Gradient:
Arrange translucent acrylic beads in rainbow order for a playful yet sophisticated bracelet suitable for casual outings.
Level 2: Bold and Statement-Making Pieces
Make a splash with bold designs that demand attention:
- Mixed Media Masterpiece:
Combine wooden beads, metal spacers, and crystal accents for a boho-chic vibe that blends natural and industrial elements. - Charmed Delight:
Add multiple dangling charms between beads for a whimsical touch. Themes like travel, nature, or astrology add personality to the design.
By understanding the fundamentals of elastic bracelet-making, experimenting with diverse materials and techniques, and embracing creativity, you can craft beautiful, durable jewelry that reflects your unique style. Whether you’re crafting for fun, relaxation, or profit, elastic bracelets offer endless possibilities—one bead at a time!
Conclusion: Celebrating Your Creativity – The Joy of Making Elastic Bracelets
By understanding the fundamentals of elastic bracelet-making, experimenting with diverse materials and techniques, and embracing creativity, you can craft beautiful, durable jewelry that reflects your unique style. Whether you’re crafting for fun, relaxation, or profit, elastic bracelets offer endless possibilities—one bead at a time!
Level 1: Reflecting on the Crafting Experience
Making elastic bracelets is more than just a hobby—it’s a creative outlet that fosters mindfulness and self-expression.
- A Therapeutic Activity:
The repetitive motion of stringing beads and tying knots can be meditative, helping reduce stress and improve focus. Many find joy in the tactile experience of working with vibrant materials. - Sharing Your Creations:
Whether you gift your handmade bracelets or sell them online, sharing your work connects you with others and spreads positivity.
Level 2: Looking Ahead – Expanding Your Skills
As you grow more confident in your abilities, explore new avenues within jewelry-making to keep challenging yourself creatively.
- Experimenting with New Materials:
Try unconventional materials like leather cording, resin beads, or recycled components to give your bracelets a fresh twist. - Learning Advanced Techniques:
Take workshops or watch tutorials on wire wrapping, macramé, or bead embroidery to expand your repertoire and incorporate these skills into future projects.